What is the smallest detail I can cut without losing pieces into the machine?
Which fonts are best for laser cutting?
How do I find and remove duplicate lines?
Why isn’t the laser cutting all the way through my material?
Section 1
Question: What is the smallest detail I can cut without losing pieces into the machine?
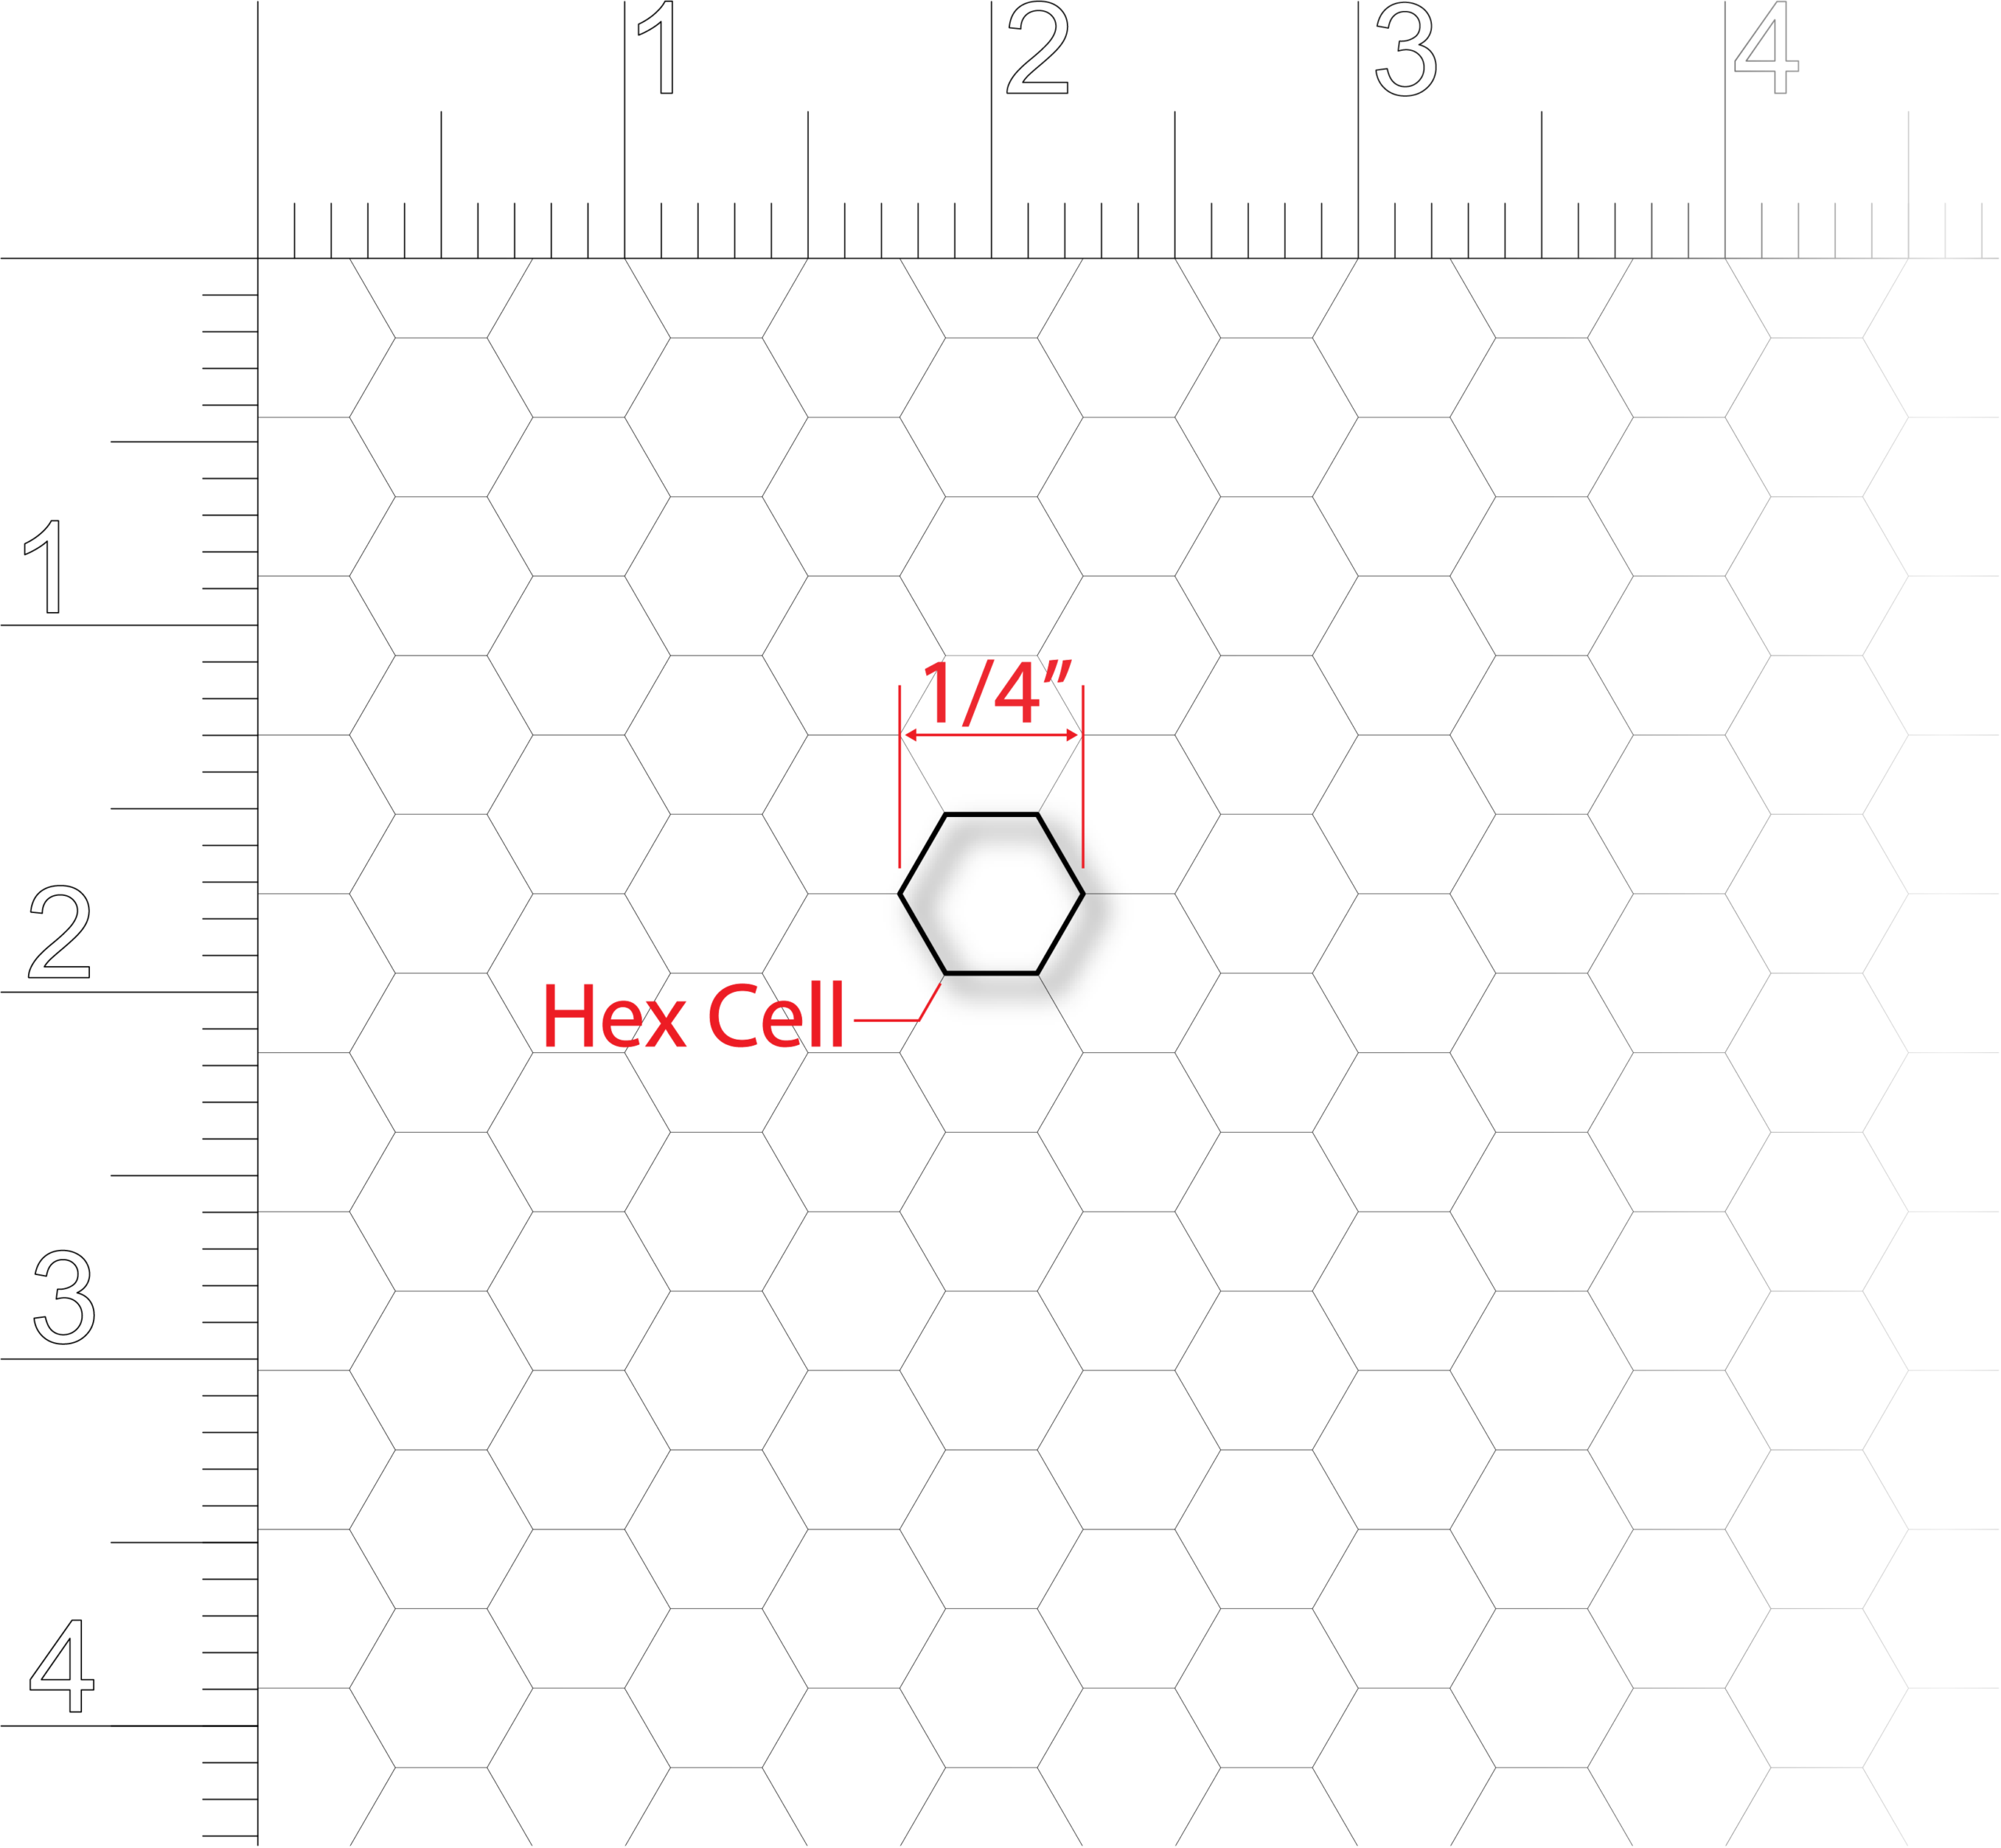
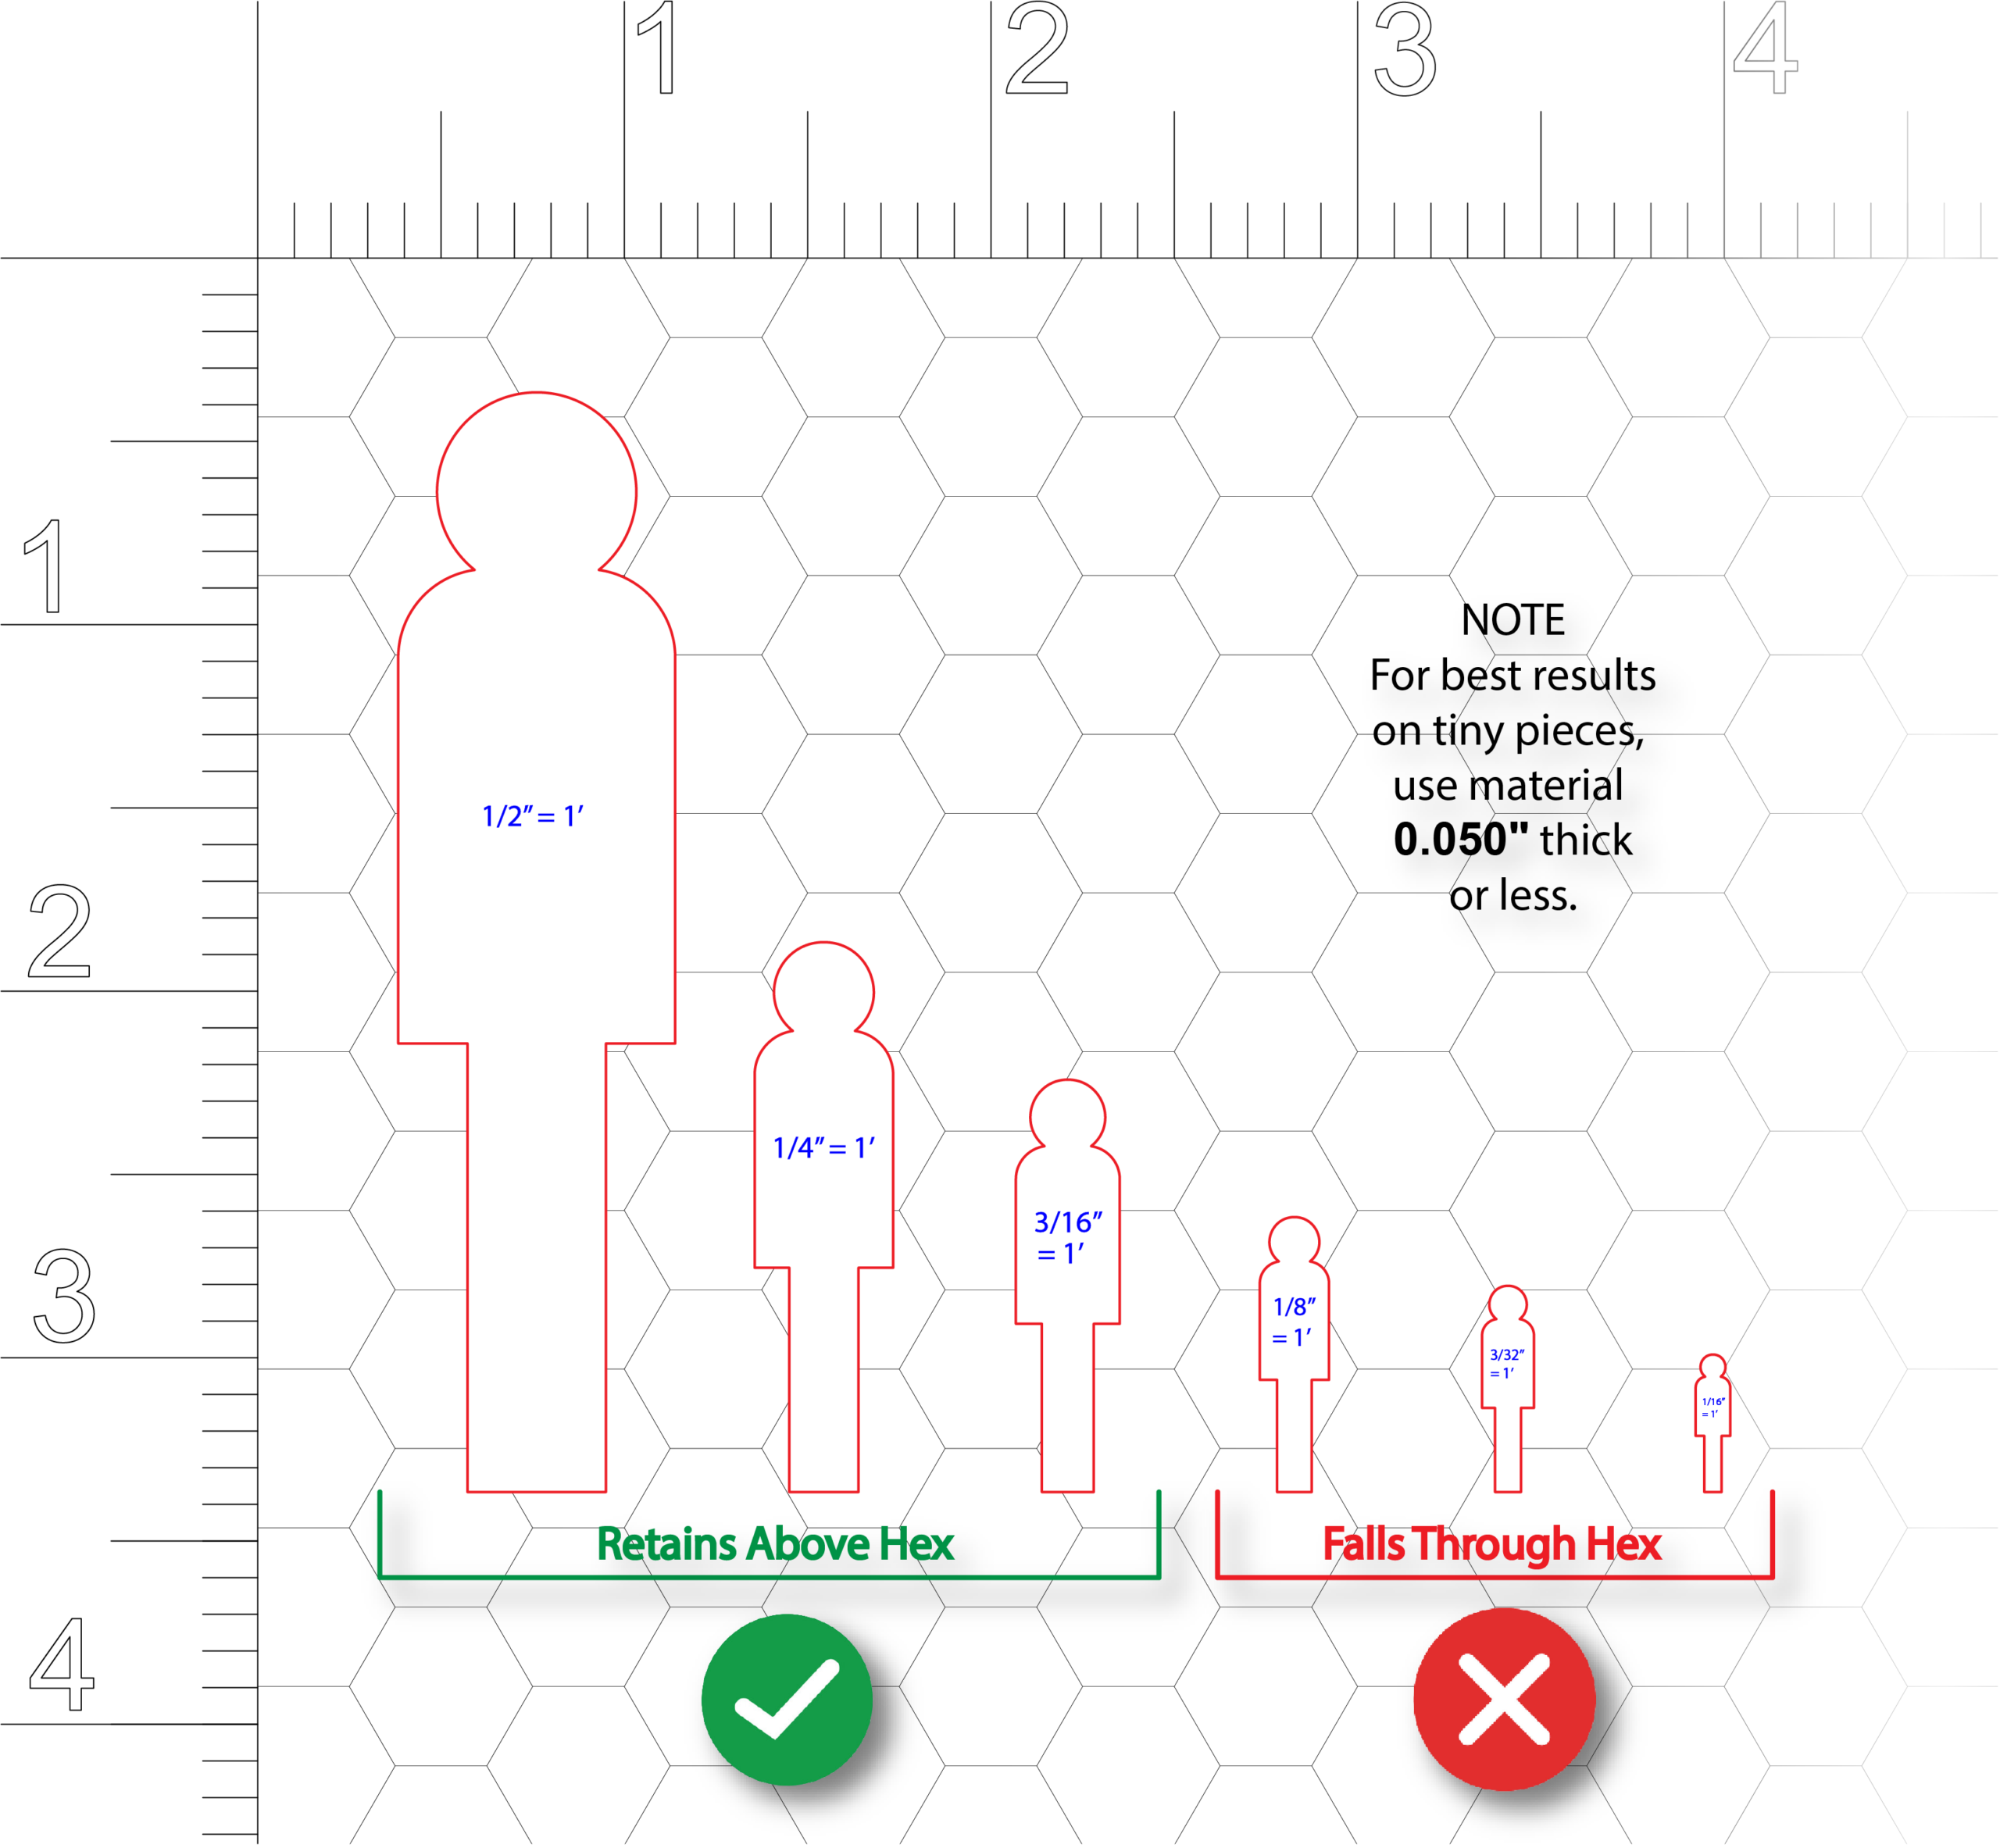
Answer: It is highly recommended to avoid cutting any individual pieces smaller than 1/4” x 1/4”.
Explanation: The laser’s honeycomb bed has 1/4” openings. Any parts smaller than this will fall through the grid into the exhaust tray and may be impossible to retrieve.
Solutions:
- Scale Up: Increase the size of your project so the smallest details exceed 1/4″.
- Score Instead of Cut: Etch the detail onto the surface rather than cutting it all the way through.
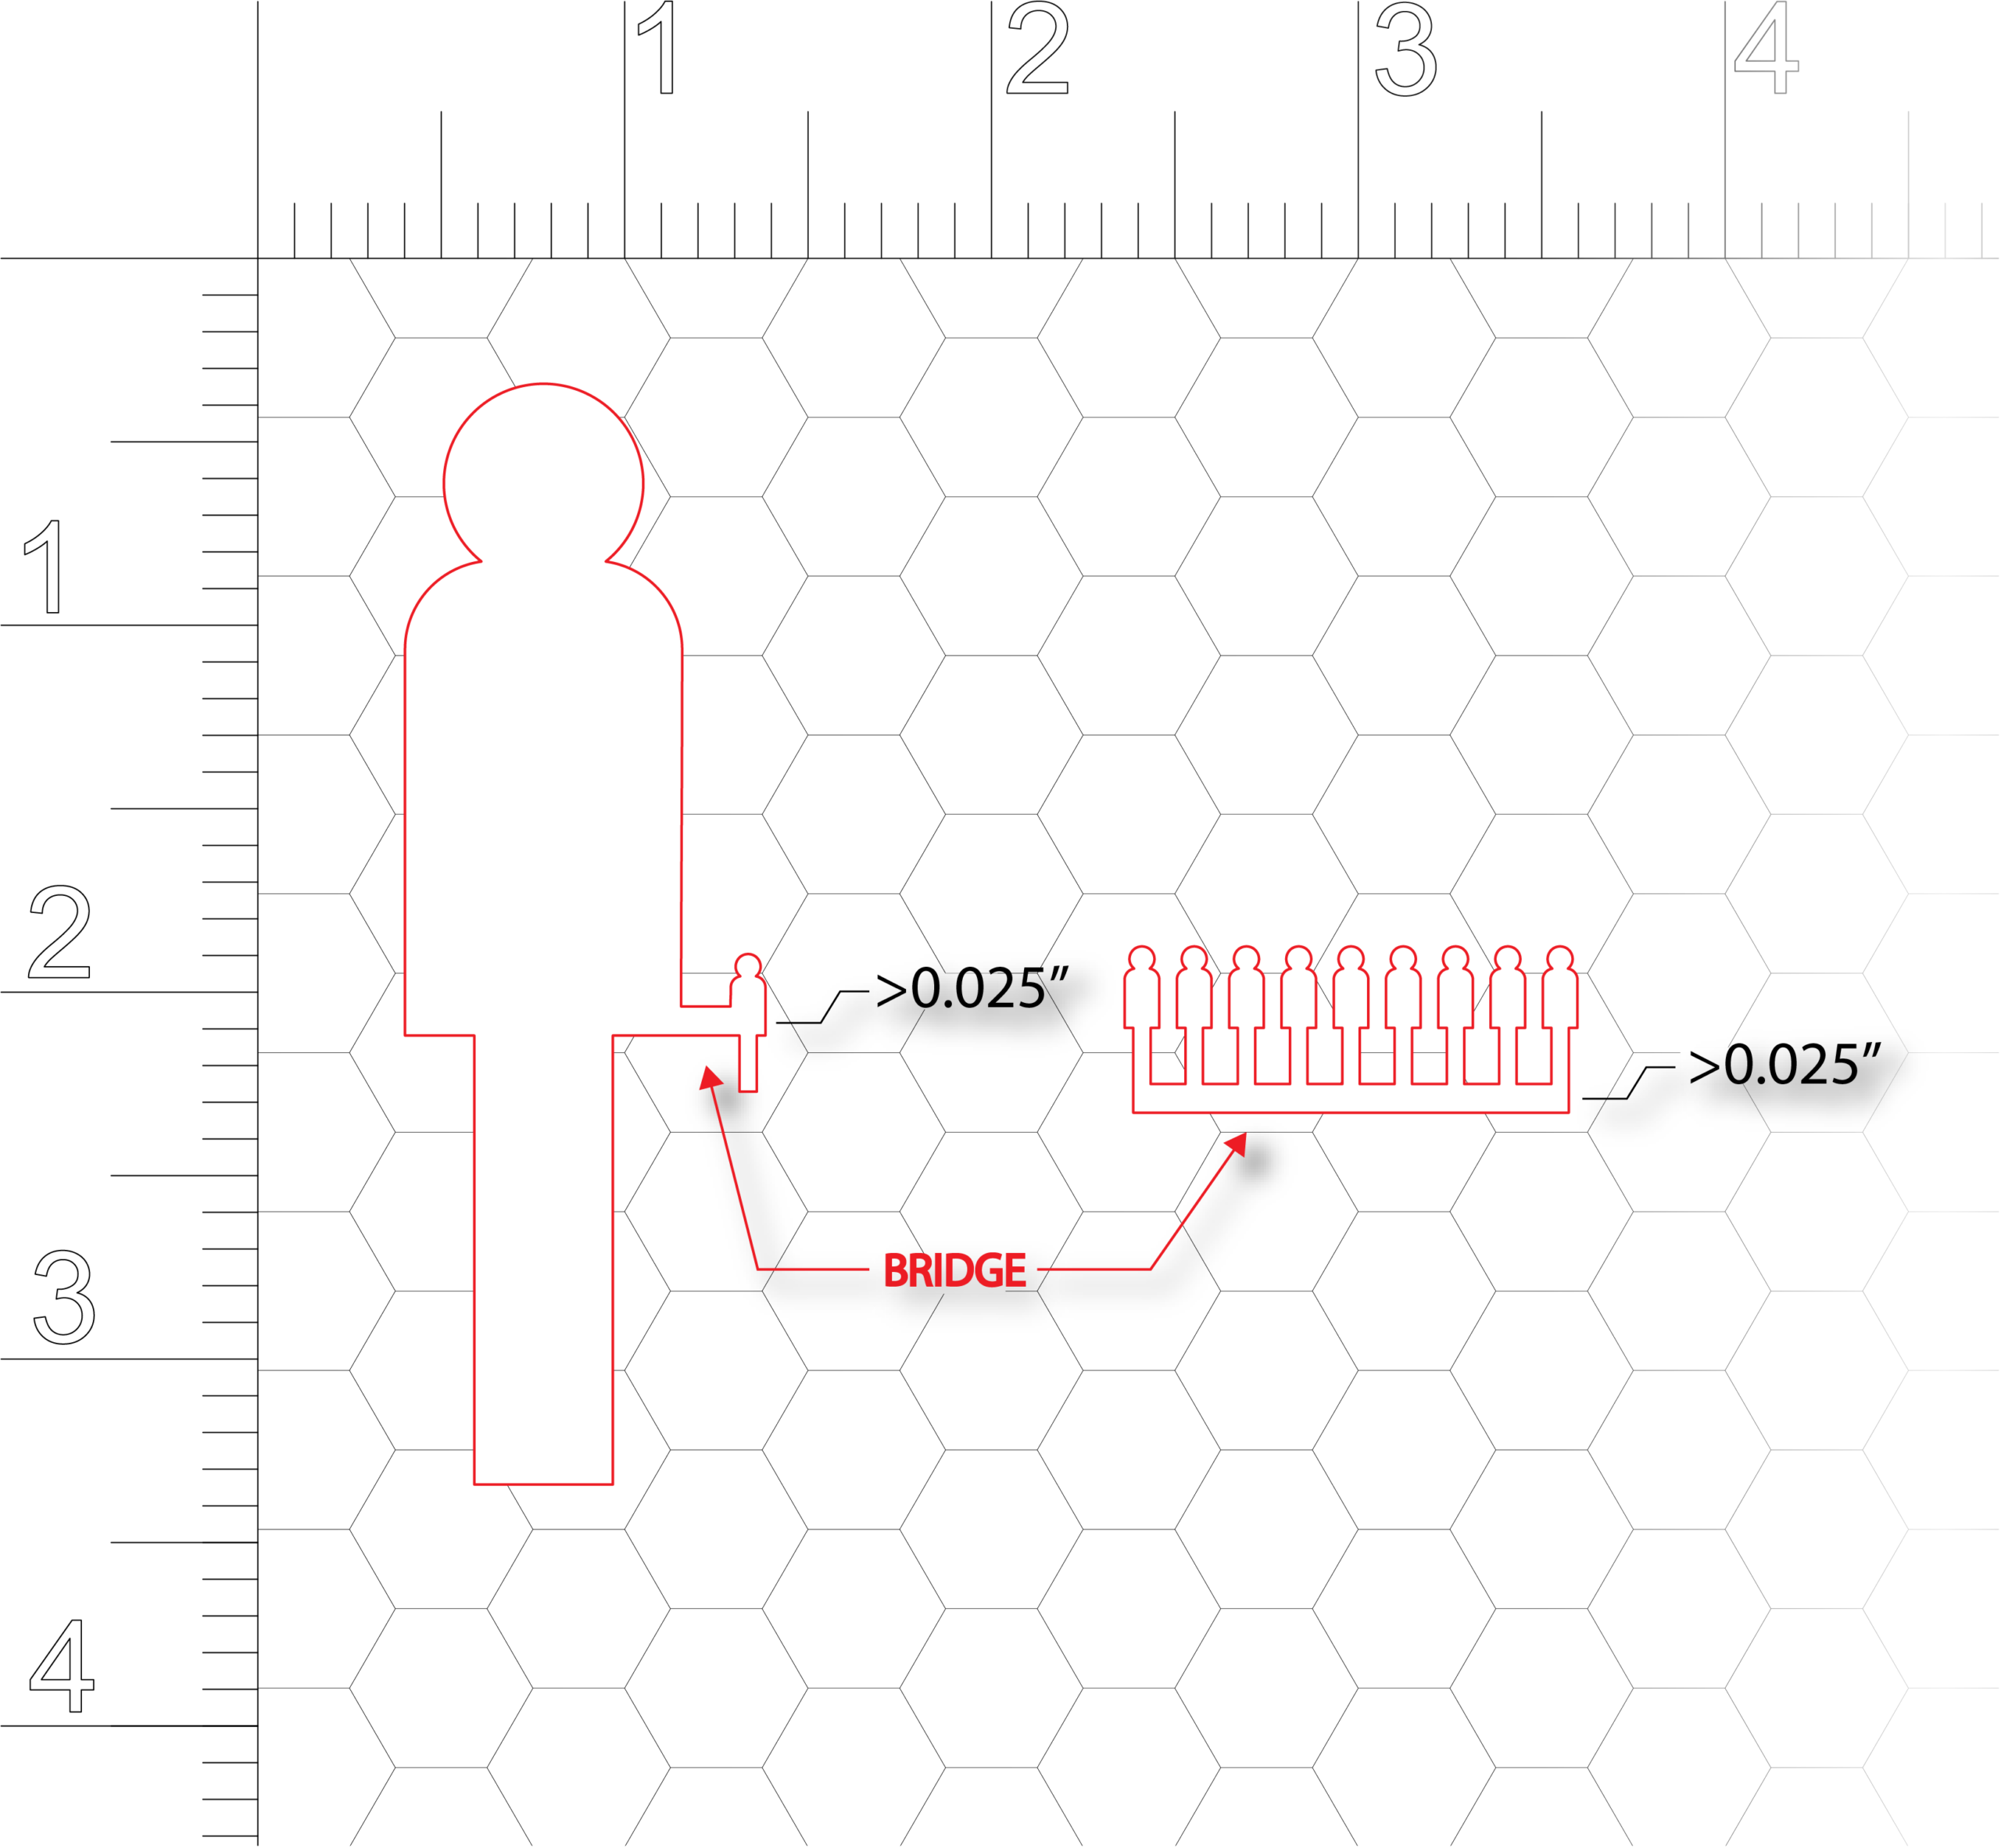
- Add Bridges: Include small bridges (tabs) to keep the part attached to the surrounding material. Use a minimum bridge width of 0.025 in. Bridges can be removed after cutting.
Section 2
Question: Which fonts are best for laser cutting?
Answer: For decorative or engraved text, use a double line font or raster to achieve a thicker, more visible appearance. For simple labels, part numbers, or marking, use a single line font (SLF).
Why use Double Line Fonts or Raster?
- Appearance: Provides a thicker, more visible aesthetic for presentations.
- Application: Ideal for engraving high quality graphics or cutting out individual letters.
Why use Single Line Fonts?
- Efficiency: Single line fonts engrave much faster because the laser follows only one path for each character.

How to Apply:
- Open the ‘Text’ command in Rhino, and select the font that is desired or the SLF-RHN.
- Text can be converted to double line font by using the command ‘Explode’.
- Ensure your text is assigned to the correct layer for “scoring” (to mark) or “cutting” (to separate the letters).
Section 3
Question: Why is the laser cutter recognizing my vector lines as a raster, or not recognizing my line colors correctly?
Answer: This usually happens because the object’s properties have been overridden instead of being controlled ‘By Layer’, or because the line colors are not set to the required RGB values. Ensure that all object properties are set to ‘By Layer’, the line weight is ‘Hairline’, and the colors are the exact RGB values required by the laser cutter (e.g., pure Red, Blue, or Black with a value of 255).
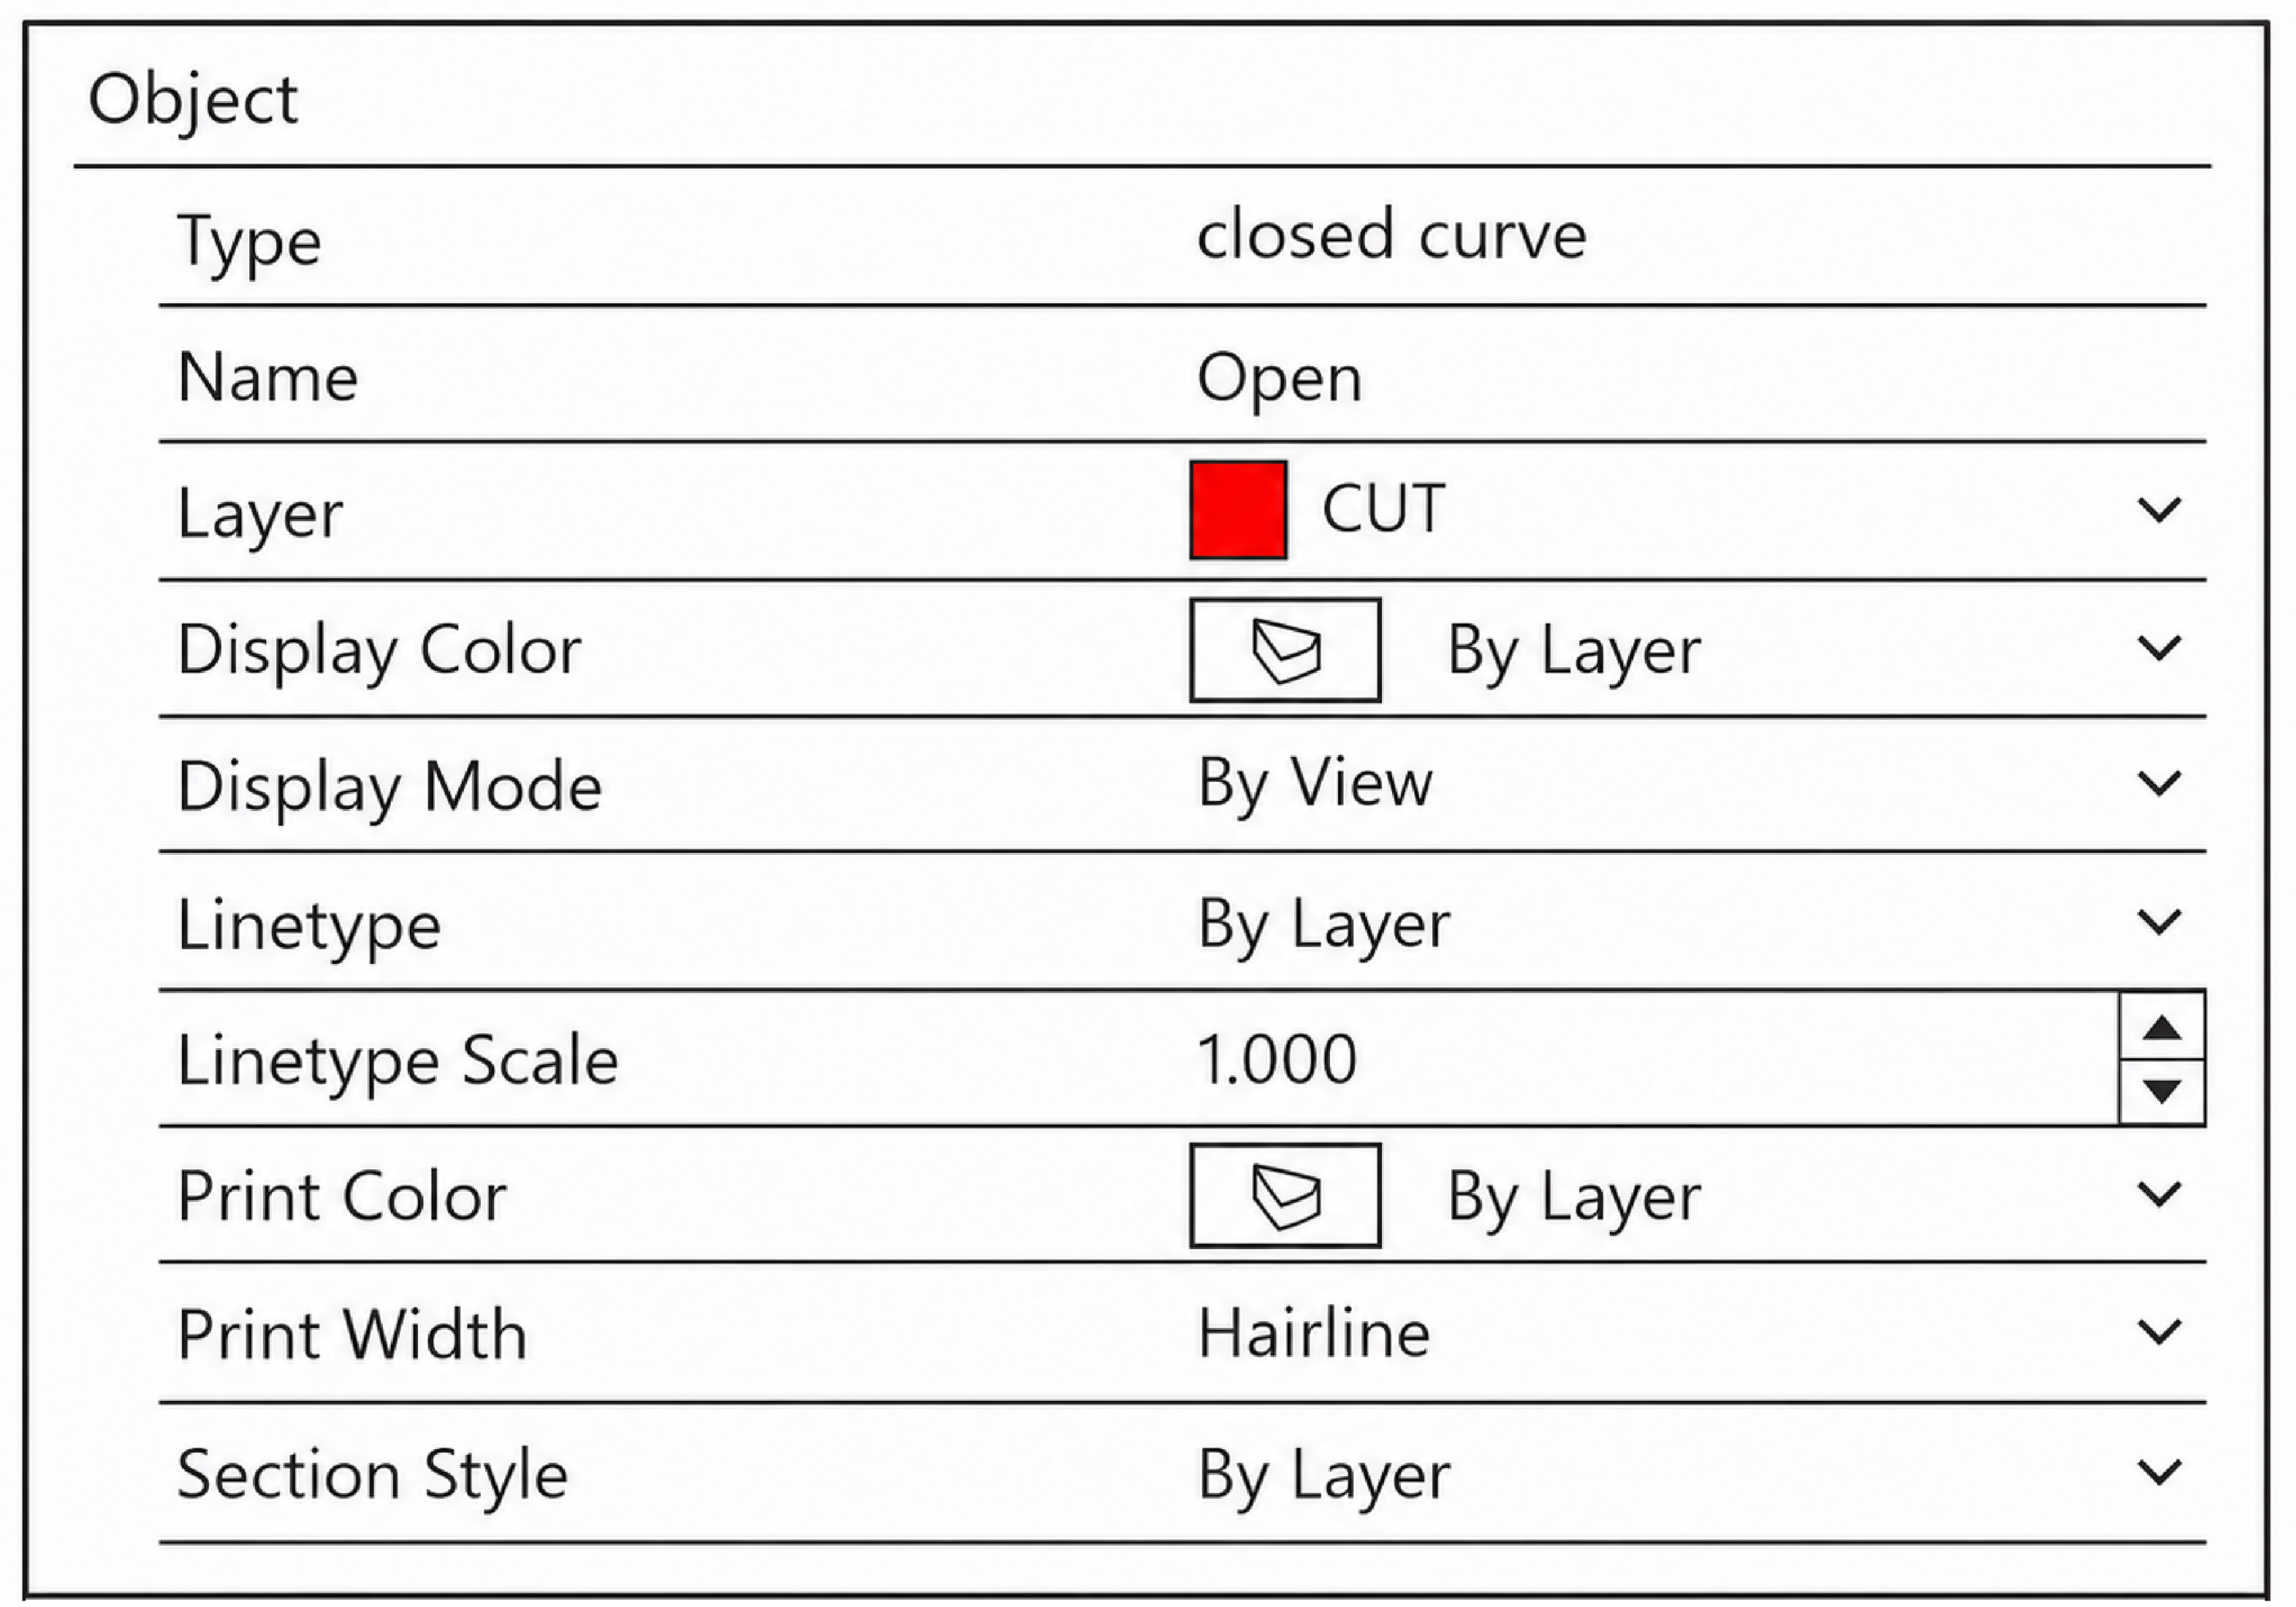
Explanation: The laser cutter identifies operations based on the exact line properties assigned to each object. If an object’s color, line weight, or other properties have been manually changed instead of inheriting the layer settings, the laser may interpret the line incorrectly, often treating it as a raster engraving instead of a vector cut or score. Likewise, if the RGB color is not set to its exact value (255 for the appropriate color channel), the software may not recognize the operation.
How to Fix (Student Responsibility):
- Select the object(s).
- In the ‘Properties’ panel, set all applicable properties to ‘By Layer’.
- Verify that the ‘Print Width’ (or line weight) is set to Hairline.
- Check the object’s color and ensure it matches the required laser color exactly:

Section 4
Question: How do I find and remove duplicate lines?
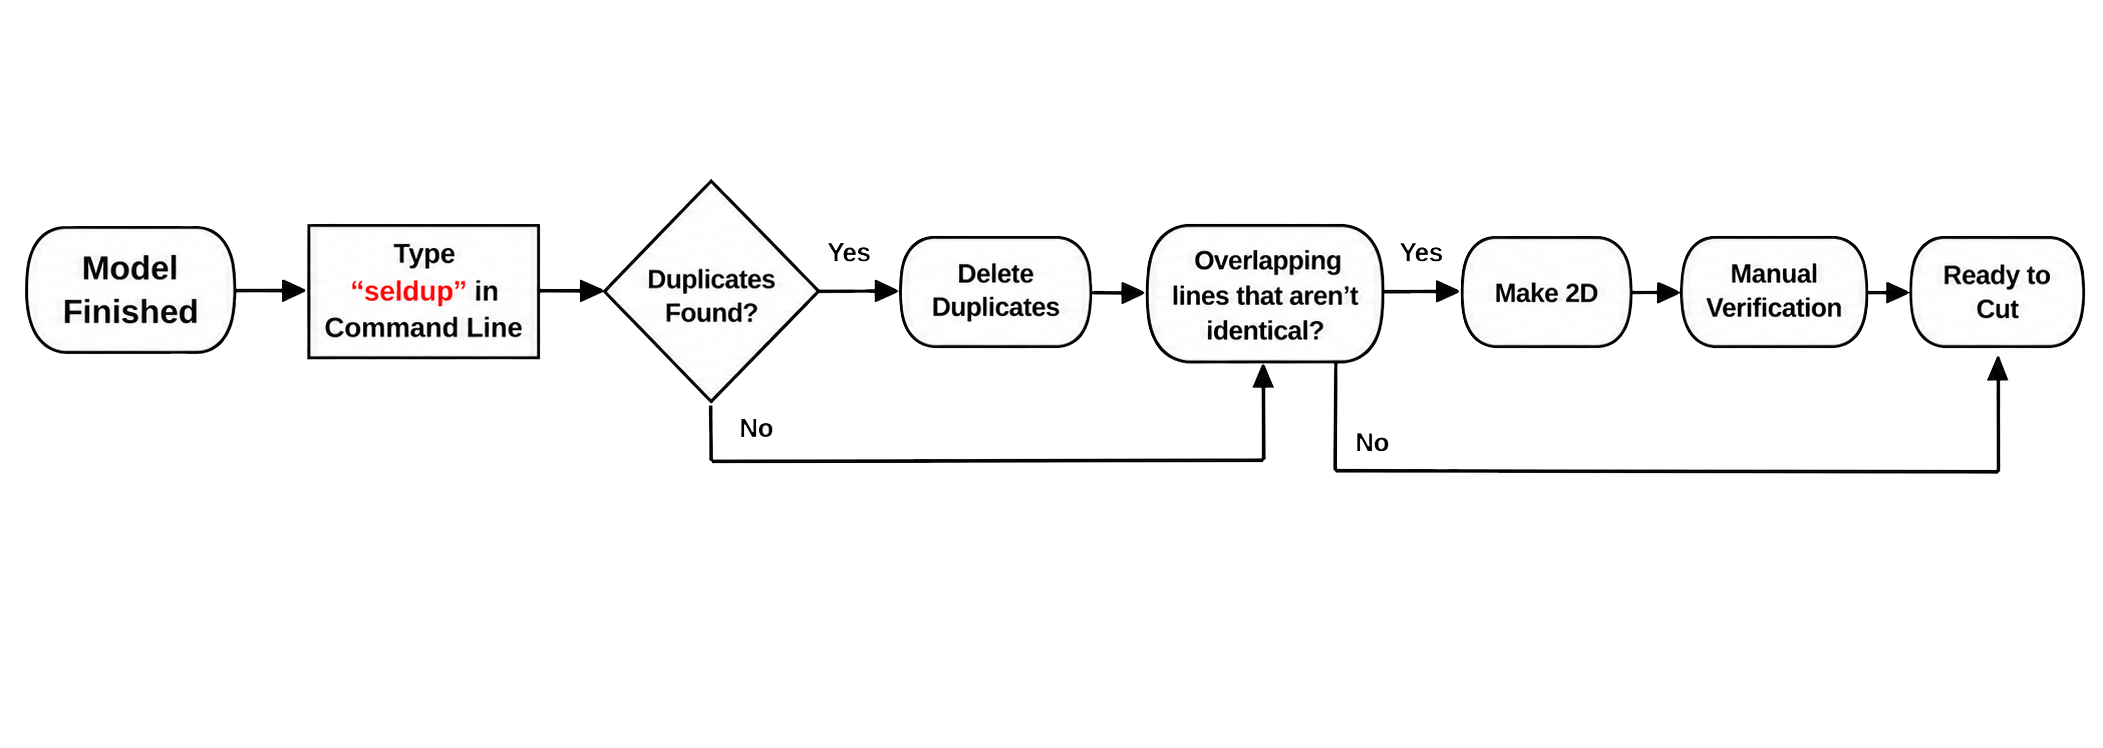
Answer: Use the ‘SelDup’ or ‘SelDupAll’ commands in Rhino to automatically select and delete overlapping geometry.
Explanation: Duplicate lines cause the laser to travel the same path multiple times leading to:
- Material Damage: Over-charred edges on wood or melted corners on acrylic.
- Wasted Time: Significantly longer laser run times.
- Poor Quality: Inconsistent line weights and imprecise fits.
How to Fix (Student Responsibility):
- Quick Clean: Type ‘SelDup’ (Select Duplicates) and press Delete.
- Advanced Clean: If lines are overlapping but not identical, use the ‘Make2D’ command:
- Select “Maintain Source Layers” to keep your cut and score colors organized.
- This flattens the geometry and helps eliminate redundant paths.
- Manual Verification: If a “cut” line and a “score” line are overlapping, manually delete the incorrect one to ensure the laser receives clear instructions.
Section 5
Question: Why isn’t the laser cutting all the way through my material?
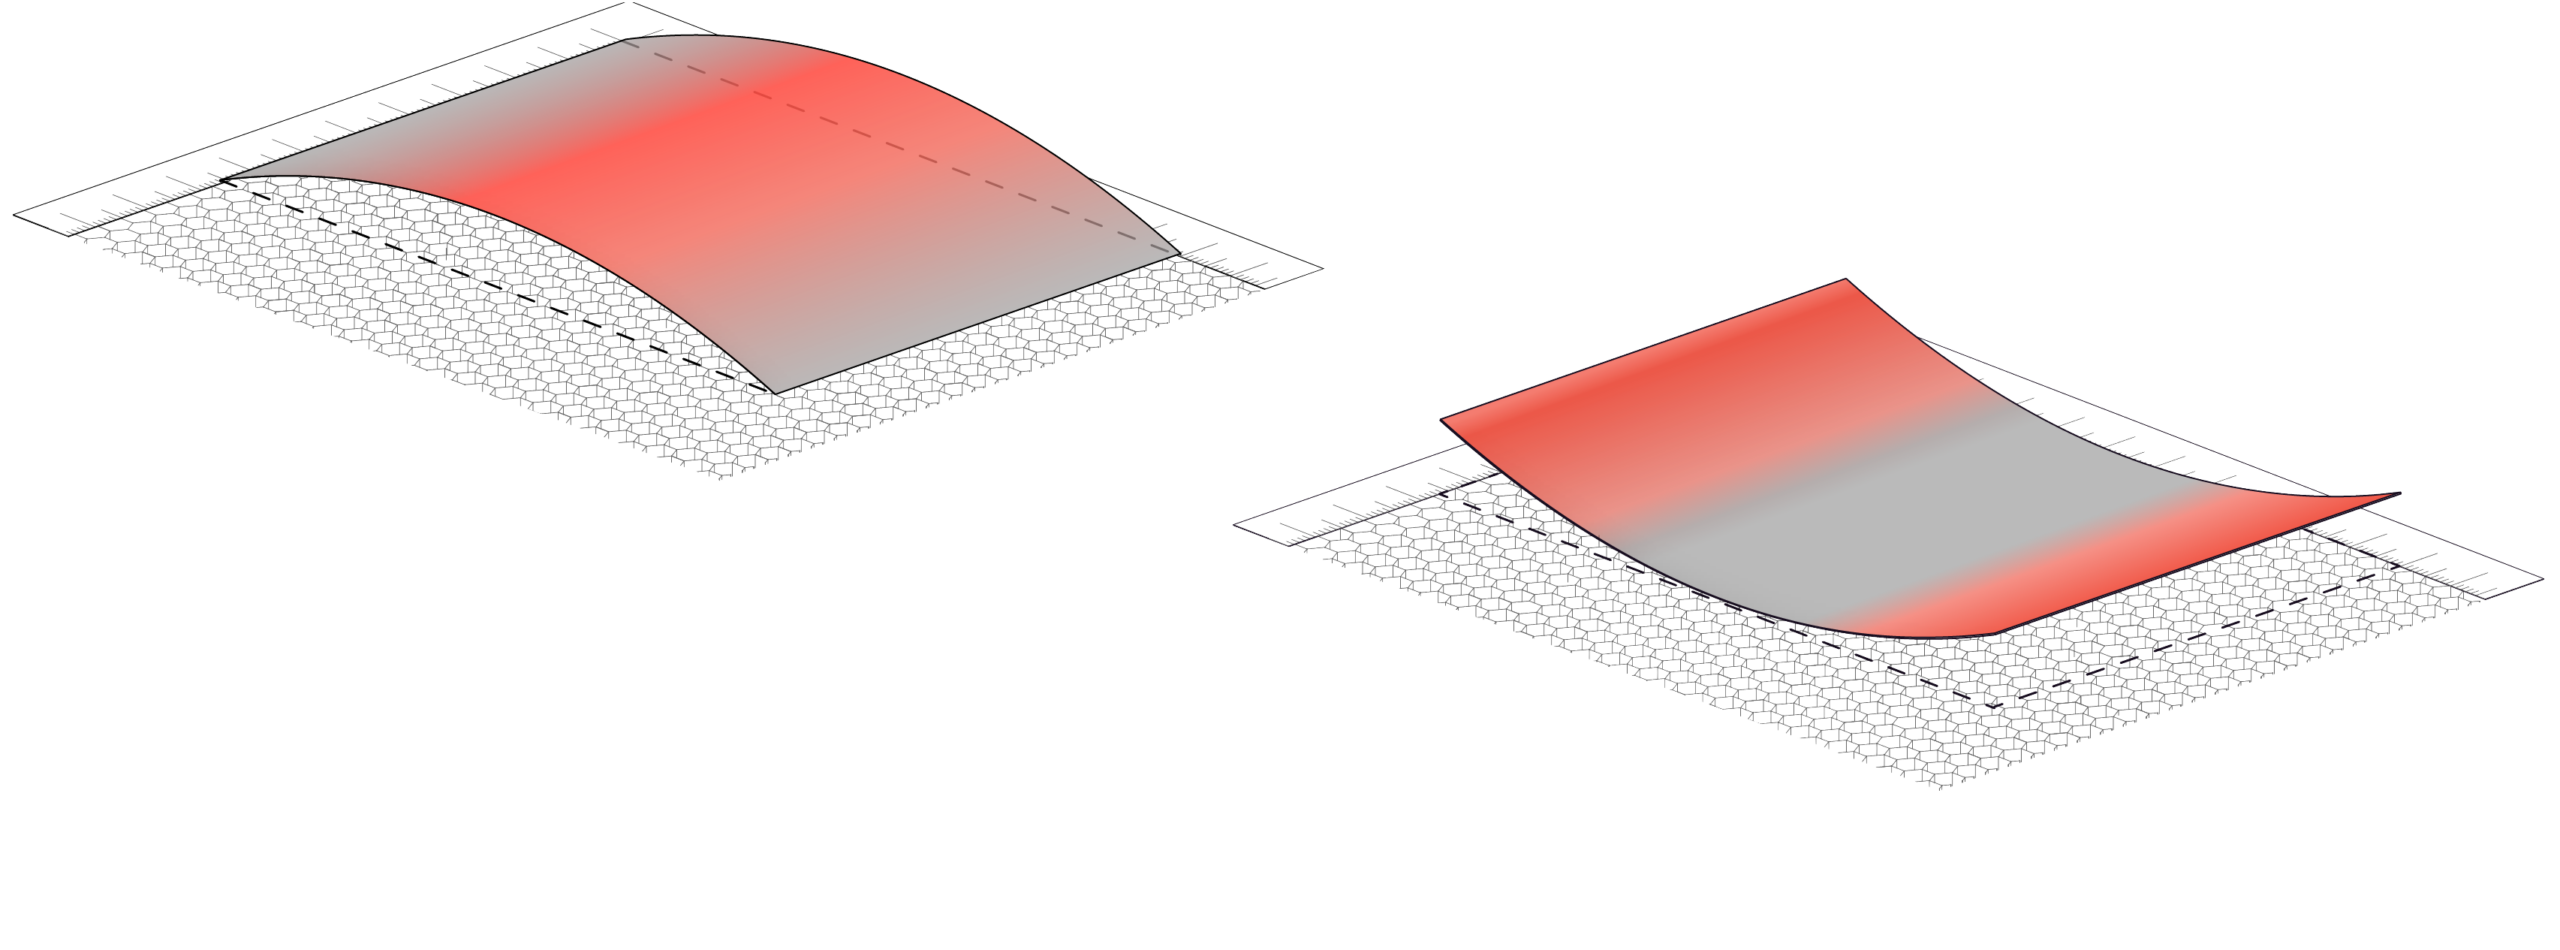
Answer: The material is likely warped or oversized, preventing it from laying flat on the laser bed.
Explanation:
- Focus Issues: Laser cutters require a precise focal distance between the lens and the material. Warped material causes the laser to go out of focus, resulting in shallow cuts, inconsistent scoring, or distorted etching.
- Safety Risks: Warped or oversized material is considered a fire hazard. If the material is not flat or sticks out past the bed, it can ignite more easily or obstruct the machine’s movement.
How to Fix (Student Responsibility):
- Flatten Material: Ensure all sheets are flat before your appointment. Use weights to press them or counter-bend the material to remove warps.
- Wood Treatment: For stubborn wood, lightly mist with water and press under heavy weights until flat.
- Pre-cut to Size: Material must be cut to fit the bed dimensions perfectly before you arrive.
