What is 3D Printing?
3D printing is an additive manufacturing process that creates physical objects by building material up layer by layer from a digital three-dimensional model.
The 3D printers in the Digital Fabrication Lab use Fused Deposition Modeling (FDM). In this process, plastic filament is heated and extruded through a nozzle, which deposits material along programmed paths to create each layer of the print. As successive layers are added, the complete three-dimensional object is formed.
Because objects are built one layer at a time, the orientation of the model, layer height, support material, and geometry of the part can all affect how successfully a model prints and the quality of the finished object.
Slicing
Before a model can be printed, it must be sliced. Slicing converts a 3D model into hundreds of horizontal layers and generates G-code, the machine instructions that tell the printer where to move, how much material to extrude, and what temperatures and speeds to use.
During slicing, you control several settings that affect the quality, strength, material usage, and print time of your model.
Layer Thickness
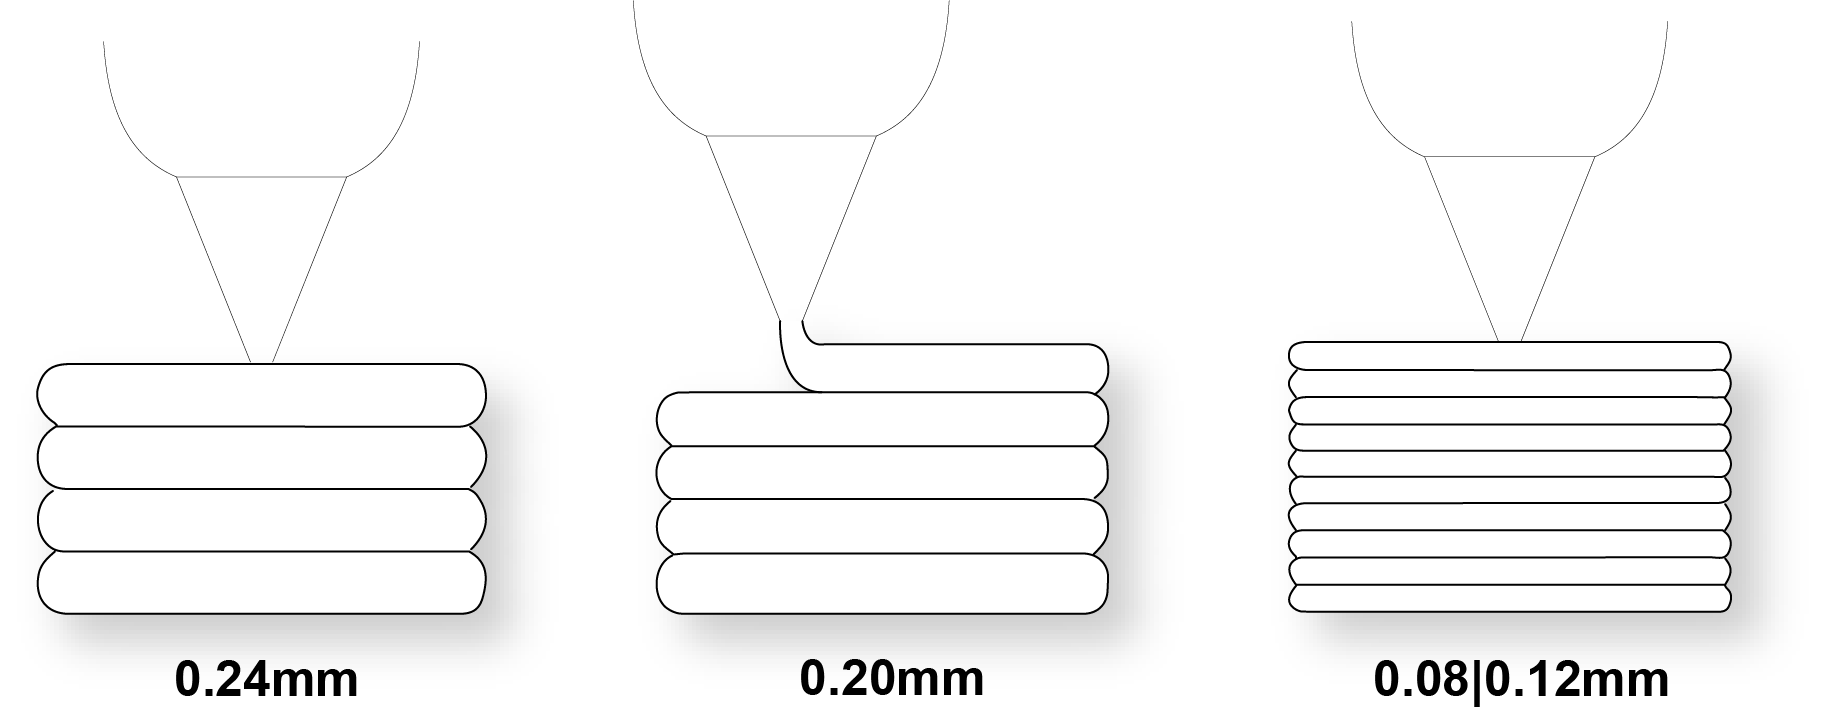
Layer thickness determines the height of each printed layer and has the greatest impact on print quality and print time.
- 0.08 mm – 0.12mm: Highest detail and smoothest surfaces, but significantly longer print times.
- 0.20 mm: Recommended for most architectural models because it provides a good balance between quality and speed.
- 0.24 mm: Best for large massing studies or quick prototypes where fine detail is less important.
Rule of Thumb: Lower layer heights produce smoother prints but increase print time.
Wall Loops
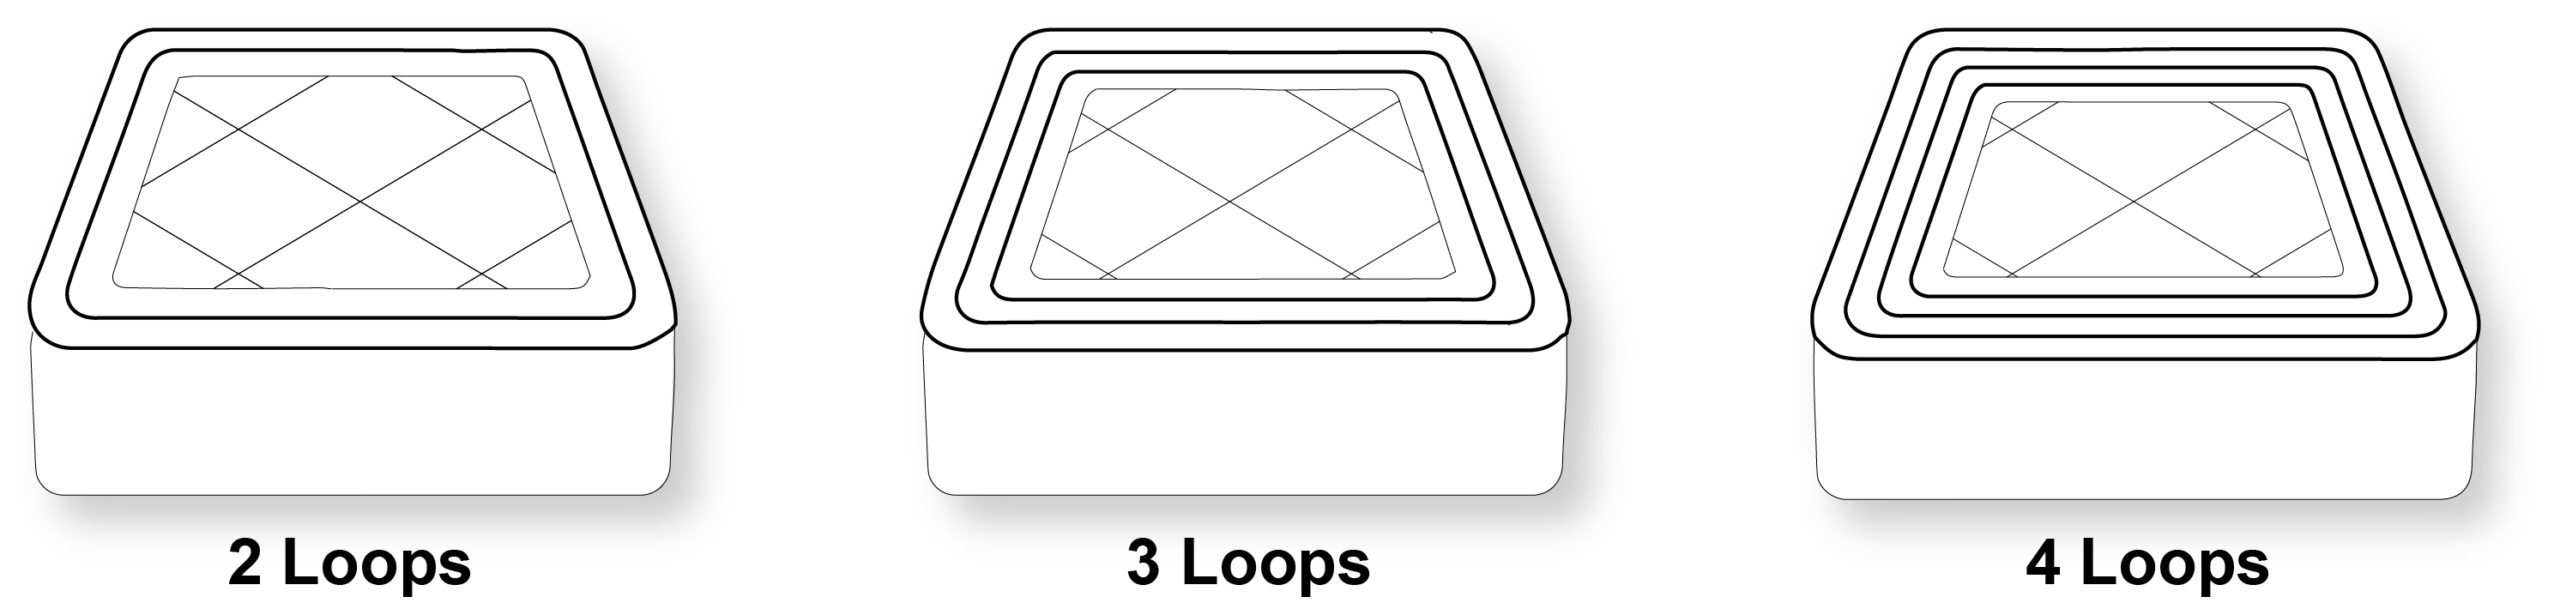
Wall loops are the solid outer paths that form the exterior of the model.
Increasing the number of wall loops generally improves strength and stiffness more effectively than increasing infill.
For most prints, the finished wall thickness should be at least 0.8 mm, which allows for two full passes with a 0.4 mm nozzle.
Infill Density
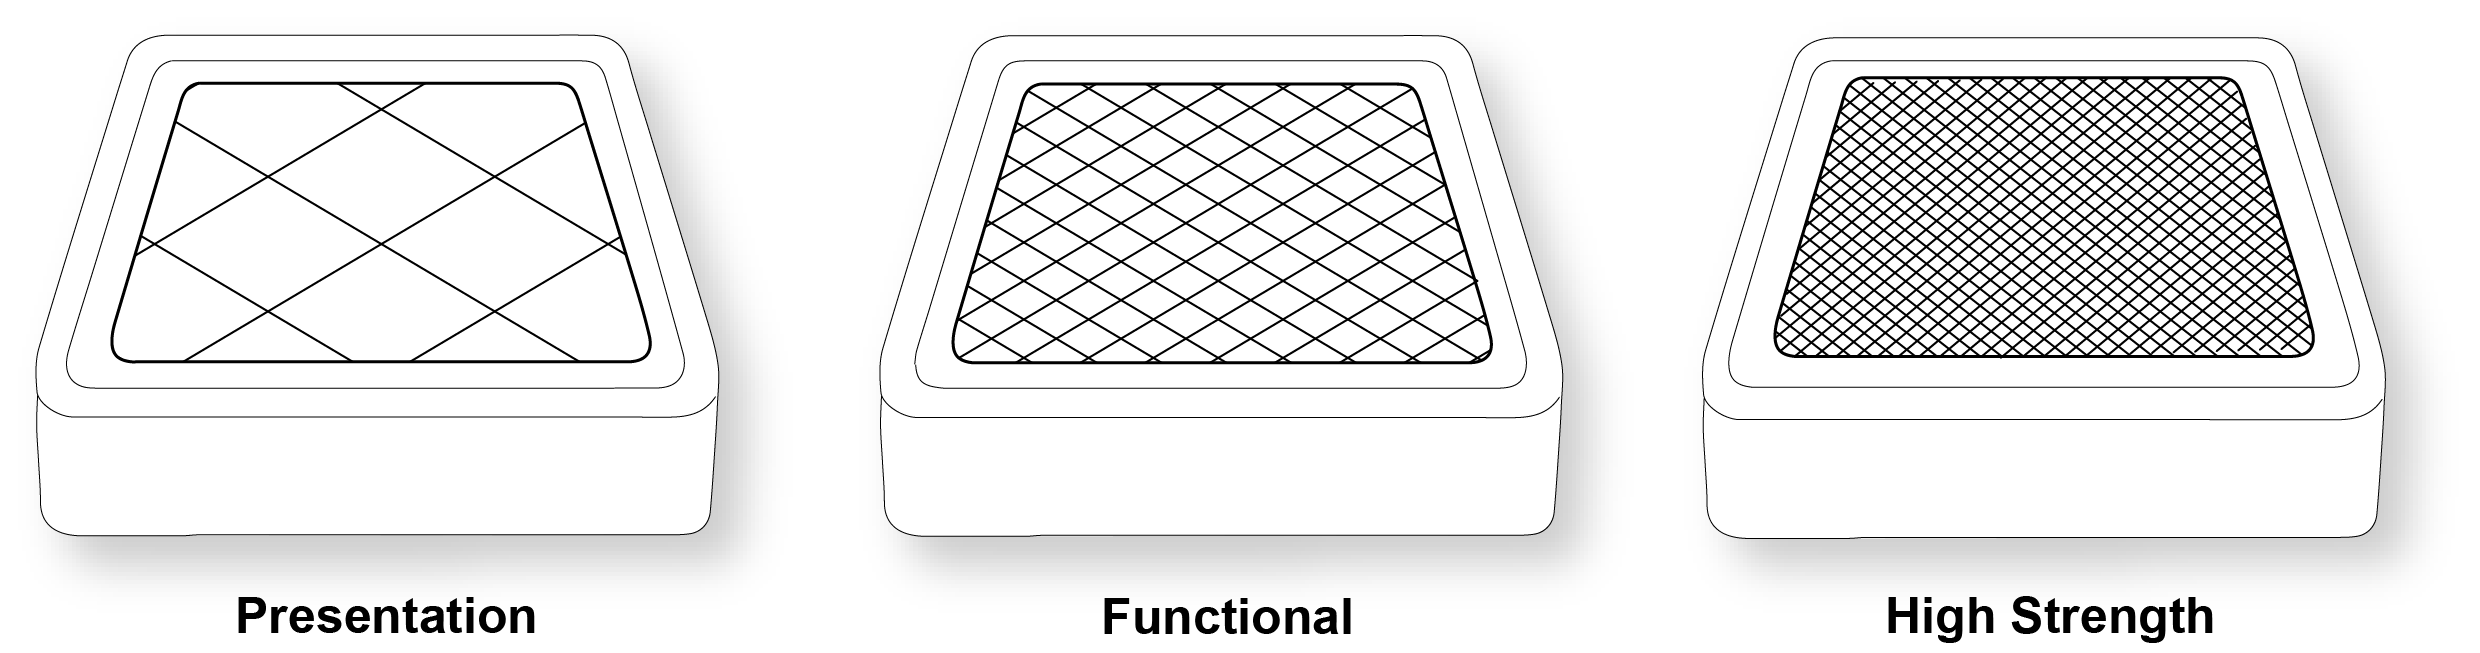
Infill is the internal structure inside a model. It provides strength while reducing material usage.
- 10–20%: Presentation models and massing studies.
- 20–40%: Functional/structural parts.
- 50%+: Parts requiring high strength.
Common patterns include Gyroid, Grid, and Cubic. Lightning infill minimizes material usage and is suitable for lightweight display models.
Supports
Supports provide temporary material beneath features that cannot be printed directly on top of the previous layer. They are commonly required for:
- Steep overhangs (typically greater than 45°)
- Horizontal cantilevers
- Long bridges
- Floating features (“islands”)
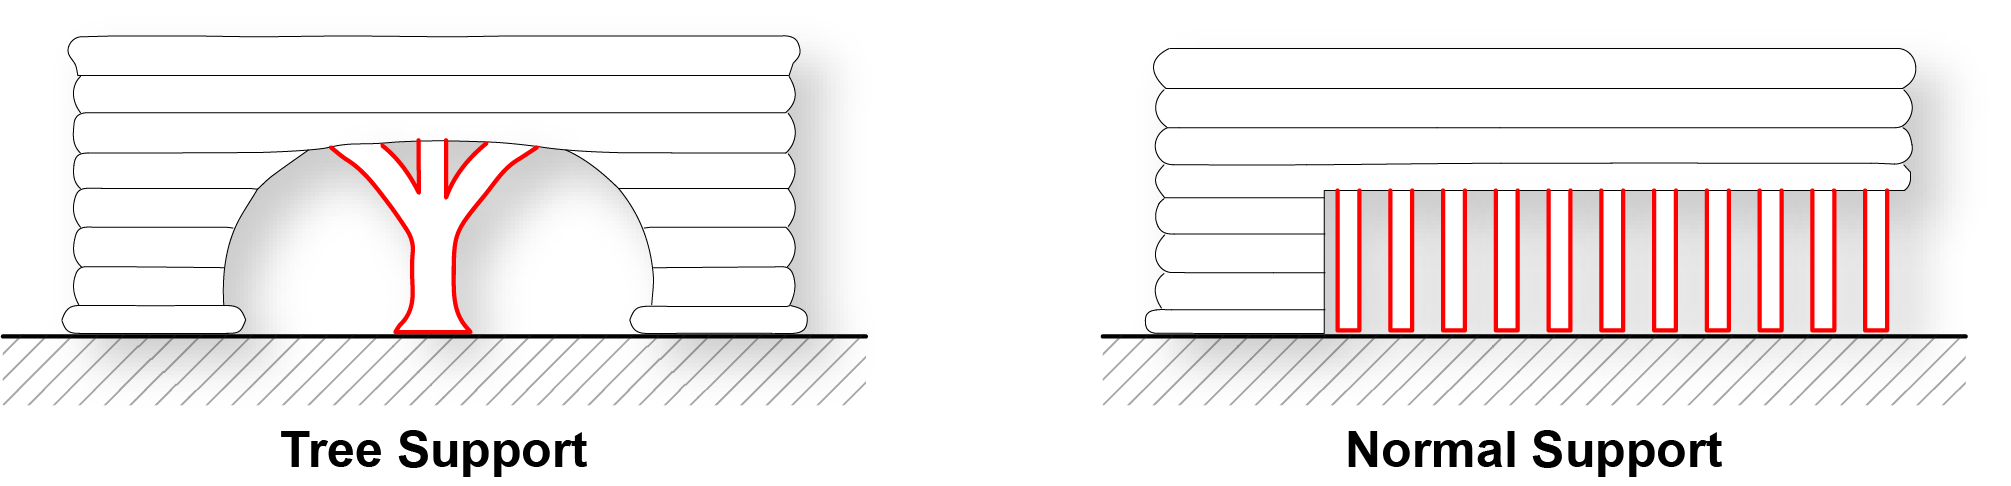
Tree Supports
Tree supports generally work best for organic, curved, or irregular geometry. Their branching structure conforms to complex geometry while using less material and is often easier to remove.
Normal Supports
Normal supports generally work best for flat, straight, or rectilinear geometry. Their rigid, evenly spaced structure provides more consistent support beneath broad horizontal surfaces.
Tip: Rotating the model before slicing can often eliminate the need for supports, reducing print time and improving surface quality.
Brim
A brim is a 5-10mm flat ring around the base to prevent warping or lifting.
Brims are recommended for:
- Tall, narrow models
- Small footprints
- Models prone to lifting or warping

